Posted on

Transform Your Bathroom with Stylish Sunney Shower Doors

Showcase of sunney shower doors in a modern bathroom featuring sleek glass and elegant fixtures.

Understanding Sunney Shower Doors

What Are Sunney Shower Doors?

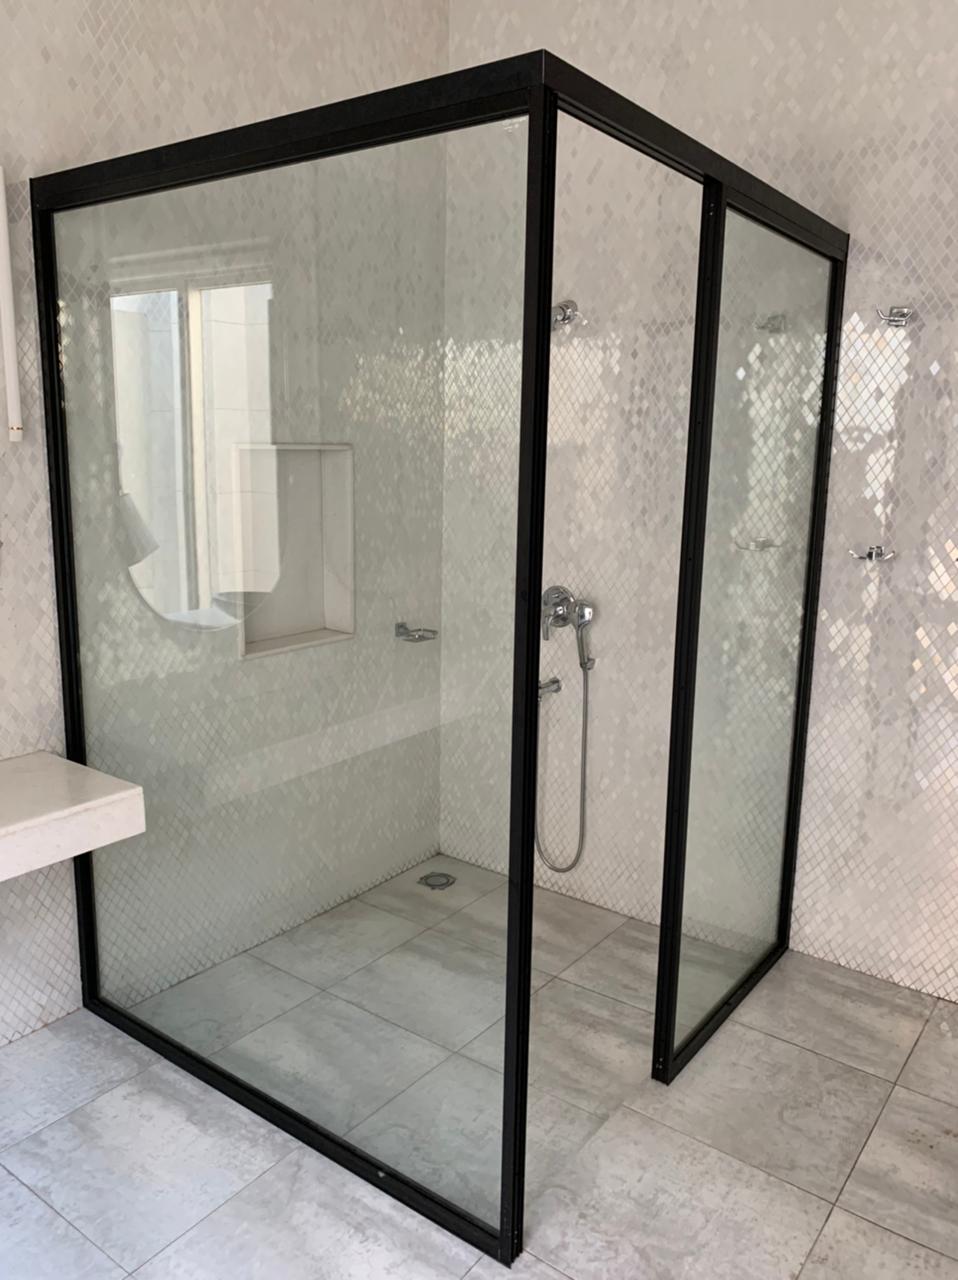
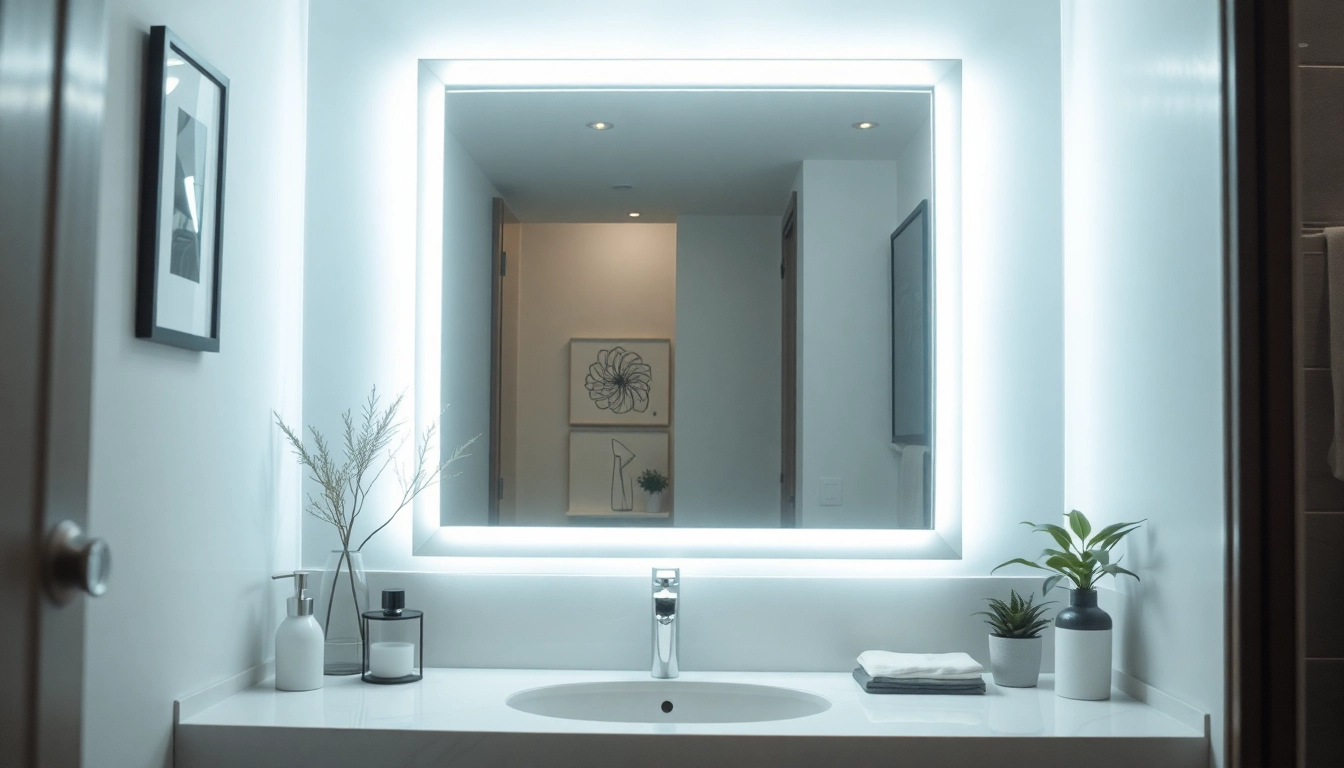
When it comes to transforming the aesthetics and functionality of your bathroom, sunney shower doors stand out as a premium choice. Designed to enclose shower spaces, these doors offer a blend of convenience and style, allowing for an unobstructed view of the shower area while also providing effective water containment. Crafted from durable materials, sunney shower doors come in a variety of styles and finishes to match any bathroom décor, enhancing the overall ambiance and elegance of the space.

Benefits of Using Sunney Shower Doors

Sunney shower doors provide numerous benefits that make them a superior option for both bathroom aesthetics and functionality. Here are some compelling reasons to consider them:

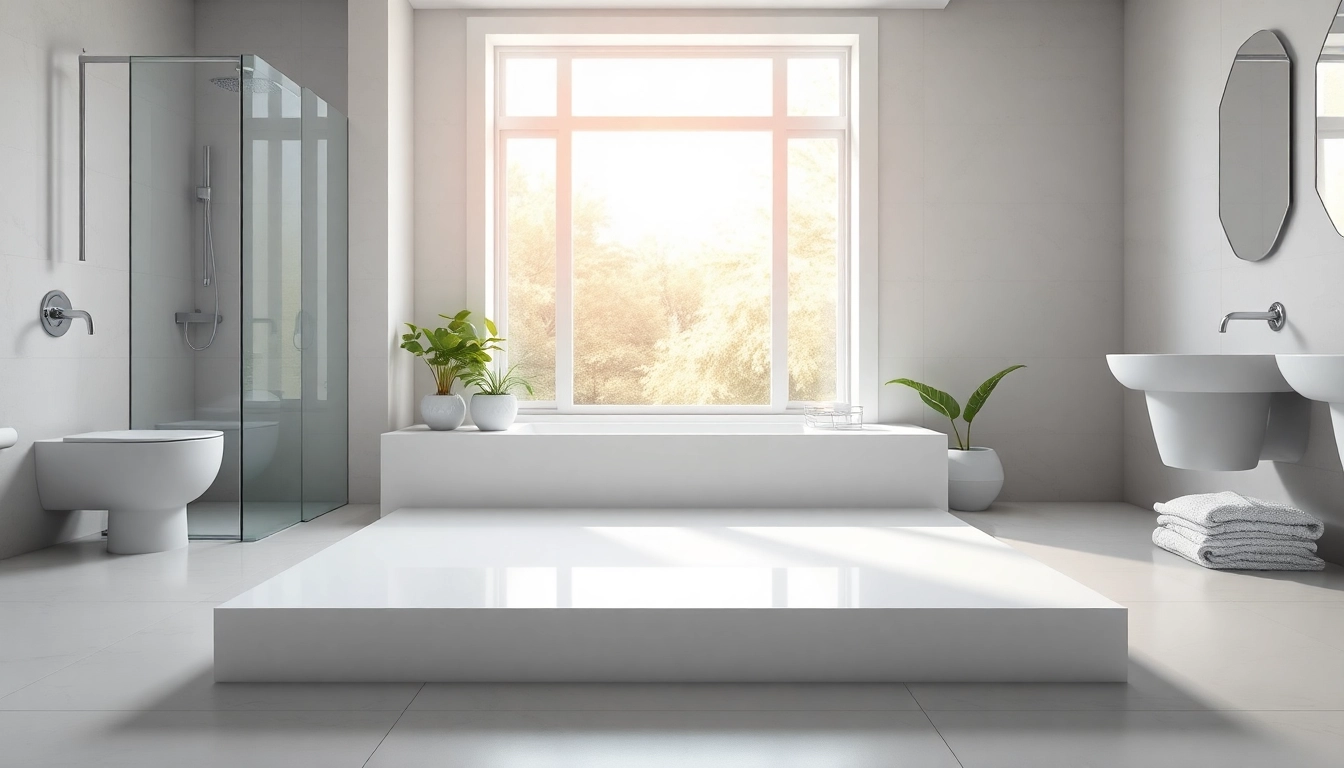
  • Enhanced Visual Appeal: With sleek designs and clear glass options, sunney shower doors can create a modern, spacious look in any bathroom.
  • Improved Safety: Made from tempered glass, these doors are designed to break into small, blunt pieces, reducing the risk of injury.
  • Easy Maintenance: Unlike shower curtains, these doors are easy to clean and maintain without the risk of mold developing.
  • Increased Home Value: Upgrading to sunney shower doors can enhance the value of your property, making it more appealing to potential buyers.
  • Energy Efficiency: By containing heat and water vapor, these doors help maintain temperature, leading to more efficient water use.

Materials and Styles of Sunney Shower Doors

Sunney shower doors are available in a variety of materials and styles, allowing homeowners to tailor their choices to suit personal preferences and bathroom designs.

Materials: The primary materials used in sunney shower doors include:

  • Tempered Glass: Durable and shatter-resistant, tempered glass is the most common choice for shower doors.
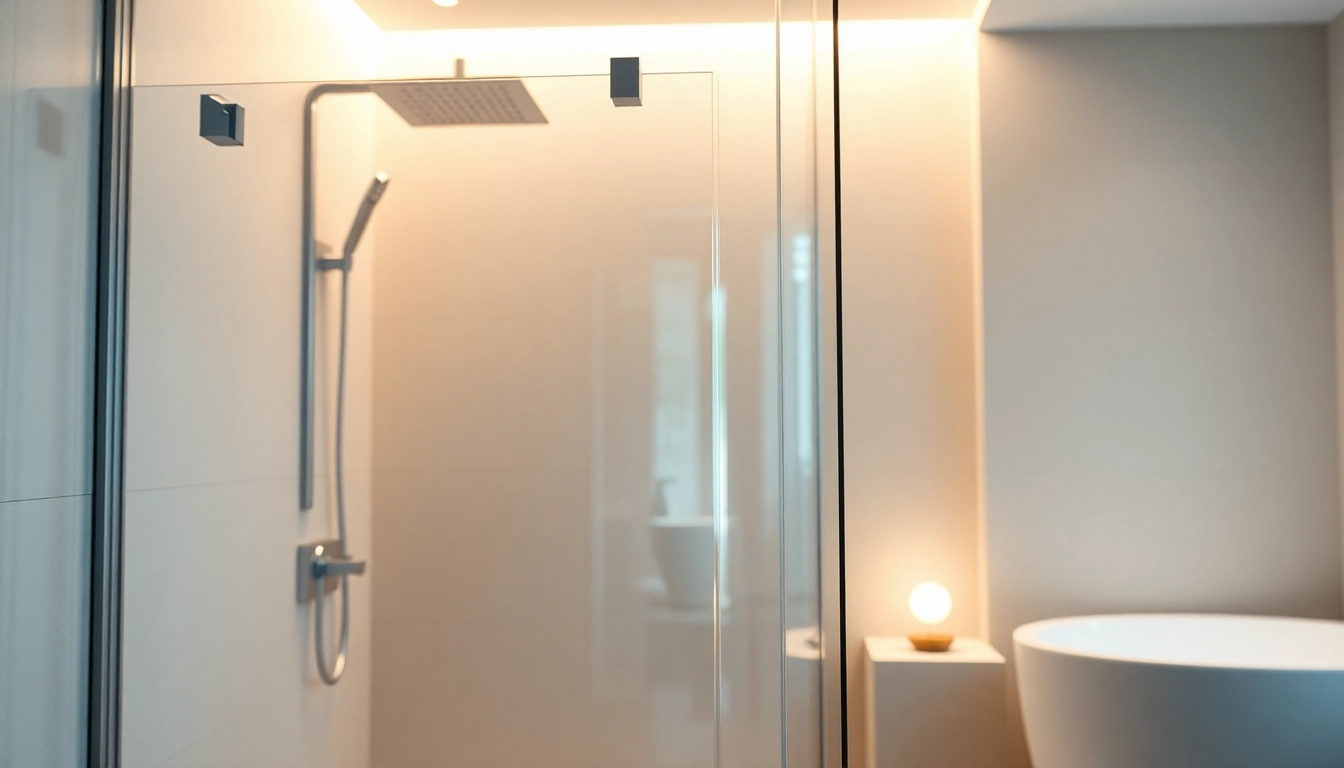
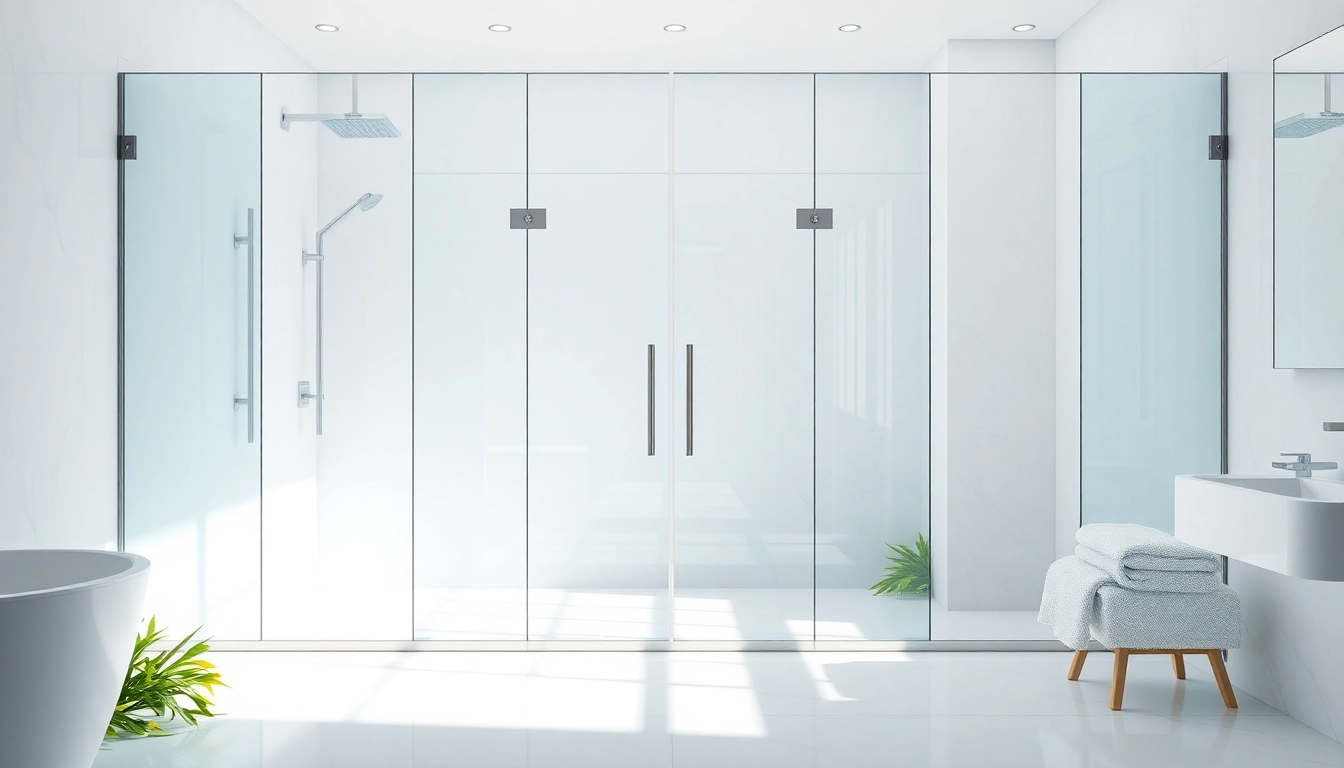
  • Frameless Options: For a sleek, modern look, frameless sunney shower doors offer minimal hardware, emphasizing the glass itself.
  • Framed Options: Available in various finishes, framed styles provide durability and can be easier to install in some cases.

Styles: There are several stylish configurations to choose from, such as:

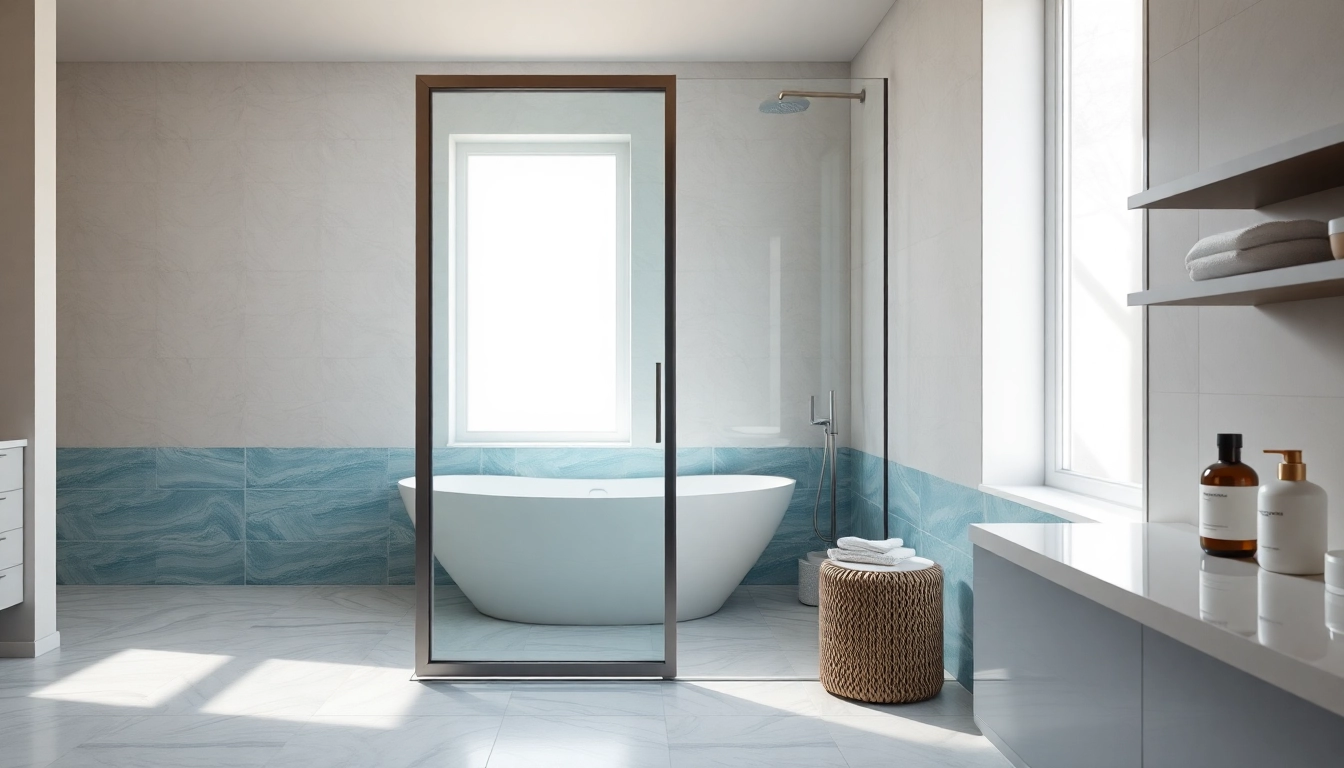
  • Sliding Doors: Ideal for compact spaces, these doors slide along a track, conserving floor space.
  • Bi-fold Doors: These doors fold inwards when opened, making them suitable for small baths.
  • Hinged Doors: Offering a traditional look, these doors swing open on hinges and can be an excellent choice for larger shower areas.

Choosing the Right Sunney Shower Doors for Your Space

Factors to Consider Before Buying

Before selecting sunney shower doors, consider the following factors to ensure you make the best decision for your space:

  • Space Size: Measure your shower area to determine the suitable size and style of the doors.
  • Bathroom Décor: Match the door design with your existing bathroom fixtures and aesthetic.
  • Budget: Determine your budget, as prices can vary based on materials, styles, and installation.
  • Usage: Consider how often the shower will be used — heavier usage may necessitate more durable options.
  • Accessibility: Ensure the selected door style accommodates users of all abilities.

Popular Styles of Sunney Shower Doors

Some of the most sought-after styles of sunney shower doors include:

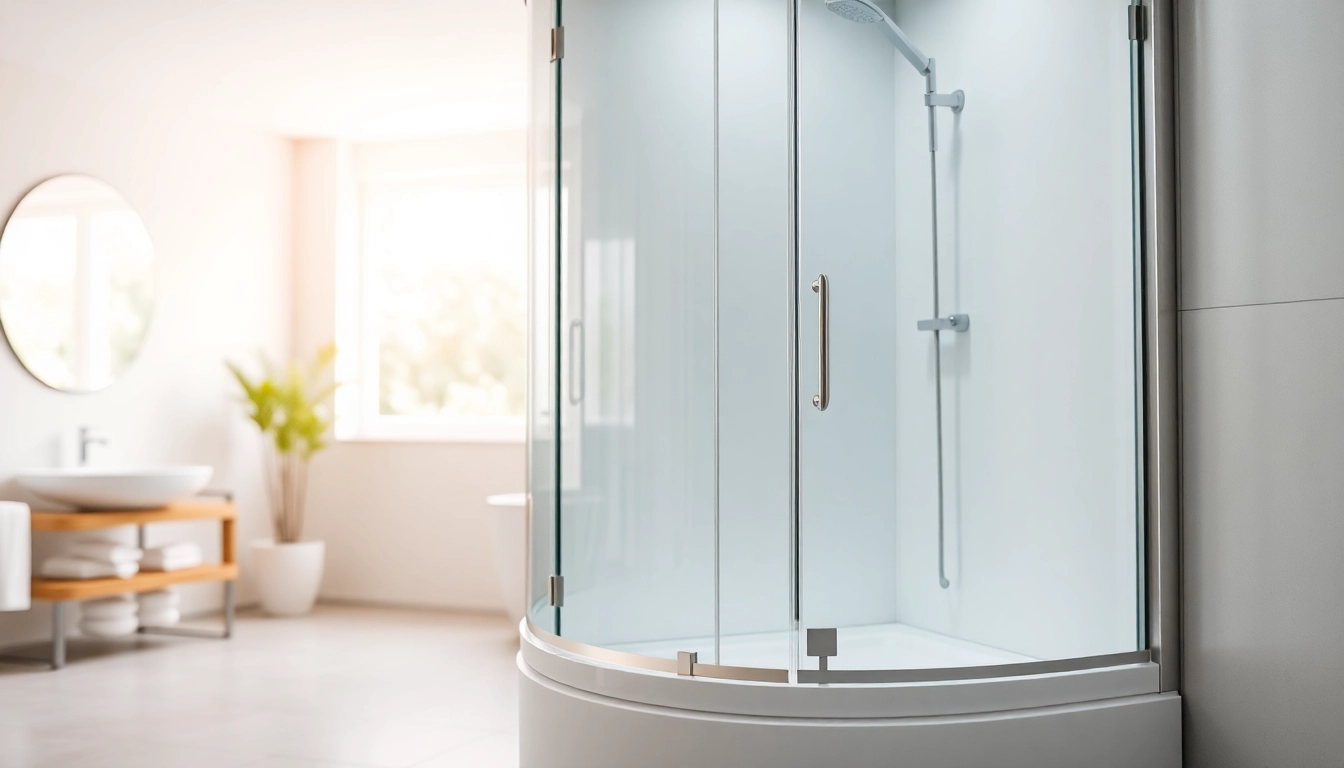
  • Frameless Sliding Shower Doors: These offer a contemporary look with easy access and minimal interruptions in aesthetics.
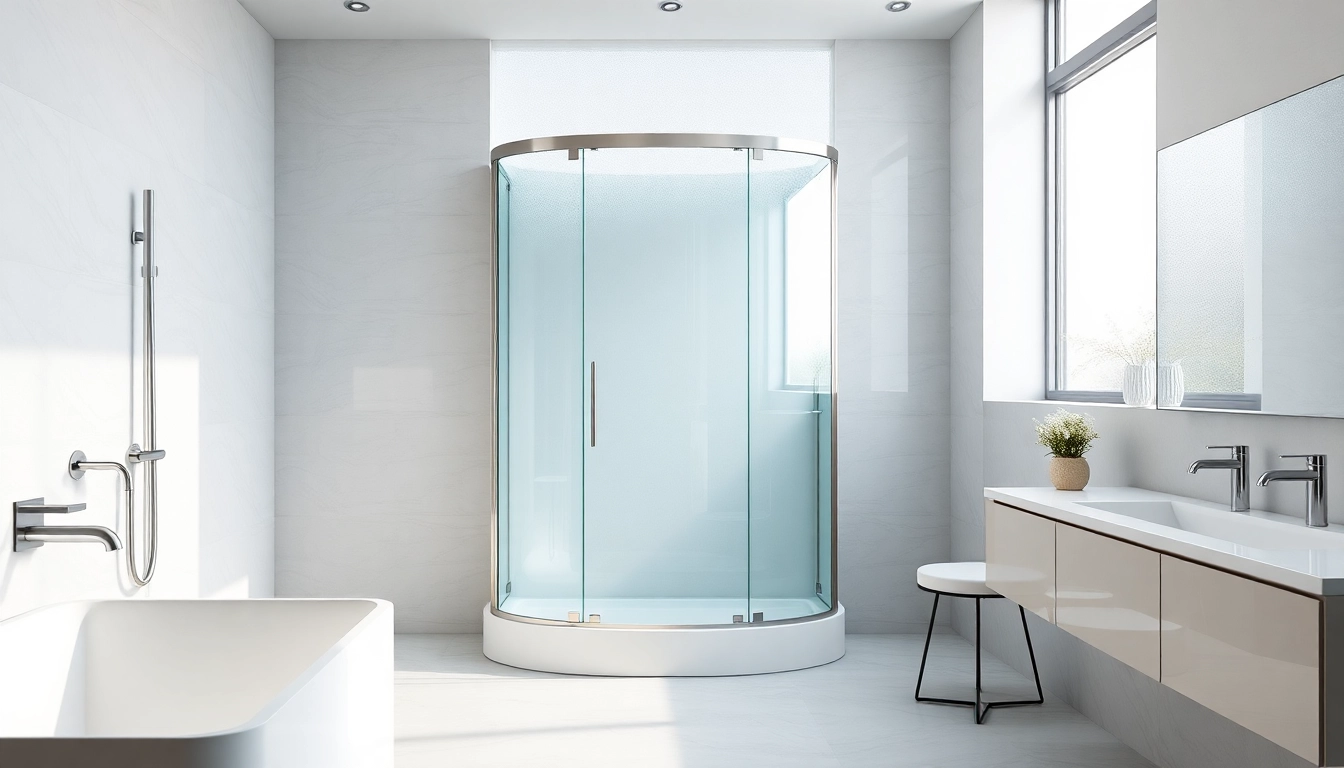
  • Curved Shower Doors: Perfect for corner installations, these doors create a unique visual appeal.
  • Quarter Round Shower Doors: Designed for small bathrooms, they fit snugly into corners, maximizing space.

Measuring Your Space for Sunney Shower Doors

Accurate measurements are crucial to ensure the proper fit of your sunney shower doors. Follow these steps:

  1. Measure the Height: From the top of the shower threshold to the top of the desired door height.
  2. Measure the Width: Measure at the top, middle, and bottom of the shower opening for accuracy.
  3. Check for Level: Ensure the shower curb is level; this affects the installation of your doors.

Bring your measurements to a professional or consult with the store for the best options available.

Installation Process for Sunney Shower Doors

Preparation Steps for Installation

Proper preparation is essential for a successful installation of your sunney shower doors. Follow these preparation steps:

  1. Gather Tools: You’ll need a level, drill, screwdrivers, measuring tape, and safety glasses.
  2. Read Instructions: Review the manufacturer’s installation guide for specific instructions regarding your chosen model.
  3. Clear the Area: Make sure the installation space is clean and free of obstacles.

DIY vs. Professional Installation

Deciding whether to undertake a DIY installation or hire a professional depends on several factors:

  • Skill Level: If you are comfortable with basic home improvement tasks, a DIY installation might be manageable.
  • Time: Hiring a professional can save you time, especially if you have busy schedules.
  • Complexity: For more complex setups or if modifications to plumbing are needed, professional help is advisable.

Common Installation Mistakes to Avoid

To ensure a smooth installation of your sunney shower doors, avoid these common mistakes:

  • Any Incorrect Measurements: Always double-check measurements before purchasing doors.
  • Ignoring Levelness: Make certain the installation area is level before attaching the doors.
  • Skipping Seal Installation: Proper sealing is critical to prevent water leakage and damage.

Maintenance Tips for Longevity of Sunney Shower Doors

Cleaning Techniques for Sunney Shower Doors

Regular cleaning of sunney shower doors is essential to maintain their appearance and functionality:

  • Use a Non-Abrasive Cleaner: Triangle-shaped sponges or microfiber cloths work great without scratching the glass.
  • Rinse After Each Use: Rinsing off soap scum and body oils can help prevent buildup.
  • Weekly Deep Clean: Schedule a more thorough cleaning weekly using a vinegar solution to combat mineral deposits.

Preventing Water Spots and Stains

Water spots and stains can diminish the look of your sunney shower doors. To prevent this:

  • Install a Water Softener: This reduces mineral deposits that lead to spots.
  • Use a Rain Repellent Spray: Apply products designed to repel water on glass surfaces to make cleaning easier.
  • Dry the Doors: Wipe the doors dry with a squeegee after each shower.

Checking and Maintaining Seals and Hardware

To ensure the longevity of your sunney shower doors, regularly check and maintain seals and hardware:

  • Inspect Seals: Look for cracks or wear in the seals; replace if necessary to prevent leaks.
  • Lubricate Hardware: Apply silicone grease to tracks and hinges periodically to ensure smooth operation.
  • Tighten Screws: Check screws and bolts for tightness regularly to keep the doors secure.

FAQs about Sunney Shower Doors

How durable are sunney shower doors?

Sunney shower doors are crafted from tempered glass, making them highly durable and resistant to breakage. With proper care, they can last for many years.

Can I install sunney shower doors myself?

Yes, if you are handy and follow instructions carefully, you can install sunney shower doors yourself. However, hiring a professional is recommended for complex setups.

What styles of sunney shower doors are available?

Sunney shower doors come in various styles, including sliding, hinged, bi-fold, and framed options, providing flexibility for different bathroom designs.

How often should sunney shower doors be cleaned?

For optimal maintenance, clean sunney shower doors weekly to prevent buildup. Rinse after each use to maintain clarity and minimize water spots.

What is the warranty for sunney shower doors?

Warranties for sunney shower doors typically cover manufacturing defects for a specified period. Always check with the manufacturer for specific details.

Posted on

Duschkabine 100×100 Pendeltür – 4 Hochwertige Qualität

Wenn Sie auf der Suche nach einer modernen, funktionalen und langlebigen Duschlösung sind, ist die Duschkabine 100×100 Pendeltür die perfekte Wahl. Sie vereint Stil, Komfort und Qualität in einem Produkt und passt ideal in jedes Badezimmer, egal ob groß oder klein. In diesem Artikel erfahren Sie alles über die Vorteile, Materialien und Eigenschaften der duschkabine 100×100 pendeltür sowie nützliche Tipps für die Auswahl und Pflege.

Vorteile der Duschkabine 100×100 Pendeltür

Die Duschkabine 100×100 Pendeltür bietet zahlreiche Vorteile gegenüber herkömmlichen Duschlösungen. Zum einen ist sie platzsparend und eignet sich hervorragend für Badezimmer mit begrenztem Raum. Durch die Pendeltür wird der Einstieg besonders komfortabel gestaltet, da die Tür nach innen und außen geöffnet werden kann. Dies erhöht nicht nur die Bewegungsfreiheit, sondern minimiert auch das Risiko von Wasserspritzern auf dem Badezimmerboden.

Ein weiterer Vorteil der Duschkabine 100×100 Pendeltür ist die hochwertige Verarbeitung. Sie besteht aus stabilen Materialien, die langlebig und pflegeleicht sind. Das Glas der Duschkabine ist kratzfest und transparent, wodurch Ihr Badezimmer heller und offener wirkt. Die elegante Optik fügt sich nahtlos in jede Badezimmergestaltung ein, egal ob modern, klassisch oder minimalistisch.

Material und Verarbeitung

Die Qualität der Duschkabine 100×100 Pendeltür zeigt sich besonders in der Wahl der Materialien. Hochwertiges Einscheibensicherheitsglas (ESG) sorgt für Stabilität und Sicherheit. ESG-Glas ist extrem widerstandsfähig gegen Bruch und garantiert eine lange Lebensdauer der Duschkabine. Die Aluminiumprofile sind korrosionsbeständig und sorgen für einen stabilen Halt der Pendeltür.

Zusätzlich ist die Duschkabine mit speziellen Dichtungen ausgestattet, die das Austreten von Wasser verhindern. So bleibt Ihr Badezimmerboden stets trocken, und die Reinigung wird deutlich erleichtert. Viele Modelle der Duschkabine 100×100 Pendeltür verfügen zudem über eine Beschichtung, die Kalkablagerungen reduziert und die Reinigung vereinfacht.

Design und Funktionalität

Das Design der Duschkabine 100×100 Pendeltür kombiniert Ästhetik mit praktischer Funktionalität. Die Pendeltür ermöglicht ein flexibles Öffnen, sodass Sie auch in engen Badezimmern bequem duschen können. Die klare Linienführung und die minimalistischen Aluminiumprofile machen die Duschkabine zu einem optischen Highlight.

Zudem ist die Duschkabine 100×100 Pendeltür sehr vielseitig einsetzbar. Ob als Eckdusche, in Nischen oder in freistehender Installation – sie passt sich perfekt an verschiedene Raumkonzepte an. Auch die Integration von zusätzlichen Accessoires wie Handtuchhaltern oder Duschablagen ist problemlos möglich.

Installation und Pflege

Die Montage der Duschkabine 100×100 Pendeltür ist dank präziser Fertigung und beiliegender Montageanleitung unkompliziert. Die Pendeltür lässt sich leicht justieren, sodass ein sicherer und dichter Abschluss gewährleistet ist. Wer handwerklich geschickt ist, kann die Duschkabine selbst installieren; alternativ kann ein Fachmann die Installation schnell und professionell durchführen.

Bei der Pflege der Duschkabine 100×100 Pendeltür sollten Sie auf milde Reinigungsmittel achten. Essig oder aggressive Reiniger können die Glasoberfläche und Dichtungen beschädigen. Regelmäßiges Abziehen des Glases nach dem Duschen hilft, Kalkflecken zu vermeiden und die Duschkabine dauerhaft in einwandfreiem Zustand zu halten.

Warum die Duschkabine 100×100 Pendeltür die richtige Wahl ist

Die Duschkabine 100×100 Pendeltür überzeugt durch ihre Kombination aus Design, Funktionalität und Langlebigkeit. Sie spart Platz, ist pflegeleicht und bietet durch die Pendeltür eine besonders komfortable Nutzung. Dank hochwertiger Materialien bleibt sie über Jahre hinweg stabil und schön. Wer auf der Suche nach einer zuverlässigen und stilvollen Duschlösung ist, trifft mit der Duschkabine 100×100 Pendeltür die richtige Entscheidung.

Darüber hinaus ist sie ideal für Familien, Singles oder Paare, die Wert auf Qualität und modernes Design legen. Die Duschkabine passt sich verschiedenen Badezimmerstilen an und macht die tägliche Dusche zu einem echten Wellness-Erlebnis.

Fazit

Die Duschkabine 100×100 Pendeltür ist eine hochwertige, praktische und elegante Lösung für jedes Badezimmer. Mit ihrer robusten Verarbeitung, dem cleveren Pendeltür-Design und der einfachen Pflege bietet sie ein unschlagbares Preis-Leistungs-Verhältnis. Egal ob Sie ein kleines Bad optimal nutzen oder Ihrem Badezimmer einen modernen Look verleihen möchten, die Duschkabine 100×100 Pendeltür überzeugt durch Stil, Funktionalität und Langlebigkeit und ist daher eine Investition, die sich langfristig auszahlt.

Posted on

โปรแกรมบอล วันนี้ ครบทุกลีก อัปเดตล่าสุด | คะแนนสด

การติดตาม โปรแกรมบอล วันนี้ เป็นสิ่งสำคัญสำหรับแฟนบอลที่ไม่อยากพลาดทุกความเคลื่อนไหวของลีกโปรด ไม่ว่าจะเป็นพรีเมียร์ลีก, ลาลีกา, บุนเดสลีกา, เซเรีย อา หรือแม้แต่ลีกเอเชีย การรู้ตารางการแข่งขันล่าสุดช่วยให้คุณวางแผนการชมการแข่งขันและติดตามผลได้อย่างรวดเร็ว เว็บไซต์ “คะแนนสด” มุ่งเน้นให้บริการข้อมูลครบถ้วน ทั้งโปรแกรมบอลวันนี้, ข่าวสารล่าสุด, และผลบอลสดแบบเรียลไทม์

ทำไมการติดตามโปรแกรมบอลวันนี้จึงสำคัญ

วางแผนการชมการแข่งขันได้ง่ายขึ้น

การรู้ โปรแกรมบอล วันนี้ จะช่วยให้คุณสามารถวางแผนเวลาในการชมการแข่งขันไม่พลาดคู่สำคัญ อีกทั้งยังสามารถปรับตารางกิจกรรมประจำวันให้เข้ากับเวลาการแข่งขันได้

ติดตามผลการแข่งขันแบบเรียลไทม์

การอัปเดตผลบอลสดช่วยให้คุณทราบผลการแข่งขันทันที ไม่ว่าจะอยู่ที่ไหน ก็สามารถติดตามคะแนนแบบเรียลไทม์ผ่านมือถือหรือคอมพิวเตอร์

รับข่าวสารและสถิติแบบครบวงจร

เว็บไซต์ที่มีโปรแกรมบอลครบทุกลีกมักจะมีข่าวสาร สถิติผู้เล่น และข้อมูลที่เกี่ยวข้อง ทำให้แฟนบอลได้รับข้อมูลครบทุกด้าน ช่วยเพิ่มความสนุกและการวิเคราะห์การแข่งขัน

โปรแกรมบอลวันนี้: ครอบคลุมทุกลีกทั่วโลก

พรีเมียร์ลีก อังกฤษ

พรีเมียร์ลีกถือเป็นหนึ่งในลีกที่มีแฟนบอลติดตามมากที่สุด การอัปเดต โปรแกรมบอล วันนี้ ของพรีเมียร์ลีกช่วยให้แฟนบอลไม่พลาดการแข่งขันของทีมดัง เช่น แมนเชสเตอร์ ยูไนเต็ด, ลิเวอร์พูล หรือ เชลซี

ลาลีกา สเปน

ลาลีกาเป็นลีกที่มีทีมฟุตบอลชื่อดังอย่าง บาร์เซโลนา และ เรอัล มาดริด เว็บไซต์ “คะแนนสด” มีการอัปเดตโปรแกรมบอลวันนี้ของลาลีกาแบบครบทุกคู่ พร้อมเวลาการแข่งขันและช่องทางถ่ายทอดสด

บุนเดสลีกา เยอรมนี

บุนเดสลีกาเป็นลีกที่มีความดุเดือดสูง การติดตาม โปรแกรมบอล วันนี้ ของบุนเดสลีกาช่วยให้แฟนบอลไม่พลาดการแข่งขันของทีมใหญ่ เช่น บาเยิร์น มิวนิค และ โบรุสเซีย ดอร์ทมุนด์

เซเรีย อา อิตาลี

สำหรับแฟนบอลอิตาลี เซเรีย อาเป็นลีกที่มีเสน่ห์เฉพาะตัว การอัปเดตโปรแกรมบอลวันนี้ช่วยให้แฟนบอลติดตามทีมโปรด เช่น ยูเวนตุส, อินเตอร์ มิลาน และ เอซี มิลาน

ลีกเอเชียและลีกอื่น ๆ

นอกจากลีกยุโรปแล้ว การติดตามโปรแกรมบอลวันนี้ของลีกเอเชียและลีกอื่น ๆ ก็สำคัญไม่แพ้กัน เพื่อให้แฟนบอลทั่วโลกได้รับข้อมูลการแข่งขันครบถ้วน

ฟีเจอร์เด่นของเว็บไซต์ “คะแนนสด”

ตารางโปรแกรมบอลครบทุกคู่

เว็บไซต์ “คะแนนสด” มีการอัปเดต โปรแกรมบอล วันนี้ ครบทุกคู่จากทุกลีก ทำให้ผู้ใช้งานสามารถดูตารางการแข่งขันล่วงหน้าและวางแผนการชมได้สะดวก

ผลบอลสดแบบเรียลไทม์

การรายงานผลบอลสดแบบเรียลไทม์ช่วยให้ผู้ใช้งานไม่พลาดทุกความเคลื่อนไหวของการแข่งขัน ทั้งประตู, ใบเหลือง-แดง, และสถิติสำคัญของแต่ละทีม

ข่าวสารและบทวิเคราะห์

นอกจากโปรแกรมบอลและผลบอลสด เว็บไซต์ยังมีข่าวสารและบทวิเคราะห์จากผู้เชี่ยวชาญ ช่วยให้แฟนบอลเข้าใจเกมได้ลึกขึ้นและเพิ่มความสนุกในการติดตามการแข่งขัน

การแจ้งเตือนการแข่งขัน

ฟีเจอร์แจ้งเตือนช่วยให้คุณไม่พลาดคู่สำคัญ โดยสามารถตั้งค่าการแจ้งเตือนตามทีมโปรดหรือลีกที่สนใจ

วิธีใช้โปรแกรมบอลวันนี้อย่างมีประสิทธิภาพ

เลือกลีกที่สนใจ

ผู้ใช้งานควรเลือกติดตามลีกที่สนใจ เพื่อไม่ให้ข้อมูลล้นจนเกินไป และสามารถโฟกัสกับคู่การแข่งขันที่สำคัญ

ตรวจสอบเวลาและช่องทางถ่ายทอดสด

การรู้เวลาแข่งขันและช่องทางถ่ายทอดสดช่วยให้แฟนบอลไม่พลาดทุกแมตช์สำคัญ

ใช้ข้อมูลสถิติประกอบการวิเคราะห์

การติดตามสถิติผู้เล่นและผลการแข่งขันล่าสุดช่วยให้แฟนบอลสามารถวิเคราะห์แนวโน้มเกมได้ดียิ่งขึ้น

สรุป: ติดตามโปรแกรมบอลวันนี้กับ “คะแนนสด”

การติดตาม โปรแกรมบอล วันนี้ ผ่านเว็บไซต์ “คะแนนสด” เป็นวิธีที่สะดวกและรวดเร็วที่สุดสำหรับแฟนบอลทุกคน ไม่เพียงแต่จะช่วยให้คุณไม่พลาดการแข่งขัน แต่ยังมอบข้อมูลครบทุกด้าน ทั้งข่าวสาร, ผลการแข่งขัน, และสถิติสำคัญ การอัปเดตโปรแกรมบอลวันนี้แบบเรียลไทม์ทำให้คุณสามารถวางแผนการชมการแข่งขันได้อย่างเต็มที่

Posted on

Duschkabine 100×100: Funktionen, Tipps und modernste Designs für Ihr Bad

Duschkabine 100x100 im modernen Badezimmer mit eleganter Einrichtung und natürlichem Licht.

Einführung in die Duschkabine 100×100

Was ist eine Duschkabine 100×100?

Eine Duschkabine 100×100 ist eine kompakte Duschlösung, die sich ideal für kleinere Badezimmer eignet. Mit Abmessungen von 100 cm x 100 cm bietet sie ausreichend Platz für eine komfortable Dusche, ohne den Raum zu überladen. Diese Kabinen kommen in verschiedenen Designs und Ausführungen, die sowohl Funktionalität als auch Ästhetik berücksichtigen. Die Duschkabine 100×100 ist eine beliebte Wahl für viele Haushalte, da sie eine perfekte Kombination aus Bequemlichkeit und modernem Stil ermöglicht. Wenn Sie mehr über die Duschkabine 100×100 erfahren möchten, finden Sie eine umfangreiche Auswahl auf duschkabine 100×100.

Vorteile einer Duschkabine 100×100

Die Duschkabine 100×100 bietet zahlreiche Vorteile, die sie zu einer optimalen Lösung für viele Badezimmer machen. Zu den wichtigsten Vorteilen gehören:

  • Kompakte Größe: Ideal für kleine bis mittelgroße Badezimmer, wo jeder Quadratmeter zählt.
  • Einfacher Zugang: Durch die offene und zugängliche Konstruktion ist das Ein- und Aussteigen besonders leicht.
  • Moderne Designs: Viele Duschkabinen 100×100 sind mit stylishen Glastüren, eleganten Befestigungen und modernen Armaturen ausgestattet.
  • Pflegeleicht: Glatte Oberflächen erleichtern die Reinigung, während spezielle Beschichtungen Ablagerungen minimieren können.

Materialien und Designs für Duschkabinen

Bei der Auswahl einer Duschkabine 100×100 stehen Ihnen verschiedene Materialien und Designs zur Verfügung. Die gängigsten Materialien sind:

  • Glas: Sicherheitsglas (ESG) ist weit verbreitet, da es langlebig und optisch ansprechend ist.
  • Metall: Aluminiumrahmen bieten Stabilität und können in verschiedenen Farben beschichtet werden.
  • Kunststoff: erwartet eine budgetfreundliche Option, jedoch weniger langlebig im Vergleich zu Glas.

Designtechnisch können Sie zwischen verschiedenen Stilen wählen – von minimalistischen Designs bis hin zu luxuriösen Varianten mit integrierten Dampfduschen. Personalisieren Sie die Kanten- und Türoptionen, um Ihre Duschkabine für Ihre individuellen Vorlieben und Ihr Badezimmerdekor anzupassen.

Planung Ihrer Duschkabine 100×100

Raumgestaltung und Größenwahl

Bei der Planung Ihrer Duschkabine 100×100 ist die Raumgestaltung entscheidend. Stellen Sie sicher, dass Sie den verfügbaren Platz optimal nutzen. Berücksichtigen Sie auch, wie viel Bewegungsfreiheit Sie beim Ein- und Aussteigen benötigen. Eine Duschkabine in dieser Größe benötigt nicht nur den Platz für die Kabine selbst, sondern auch genügend Raum für Türöffnungen und Bewegungsfreiheit im Badezimmer.

Installation und Vorbereitung

Die Installation einer Duschkabine 100×100 erfordert sorgfältige Planung und Vorbereitung. Stellen Sie sicher, dass die sanitären Anschlüsse bereits vorhanden sind. Achten Sie bei der Installation auf eine ordnungsgemäße Abdichtung, um Wasserschäden zu vermeiden. Es kann hilfreich sein, einen Fachmann zu Rate zu ziehen, insbesondere wenn Sie keine Erfahrung im Sanitärbereich haben.

Budgetieren für Ihre Duschkabine 100×100

Das Budget für eine Duschkabine 100×100 kann je nach Material, Design und Installation variieren. Berücksichtigen Sie die Kosten für die Kabine selbst sowie mögliche zusätzliche Ausgaben für Sanitärarbeiten oder Zubehör wie Handläufe, Duschsysteme und Beleuchtung. Es ist ratsam, einen Puffer für unerwartete Kosten einzuplanen, um Ihr Projekt nicht zu gefährden.

Pflege und Instandhaltung

Reinigungstipps für Duschkabinen

Um die Lebensdauer Ihrer Duschkabine 100×100 zu verlängern, ist regelmäßige Reinigung unerlässlich. Verwenden Sie milde Reinigungsmittel und weiche Schwämme, um Kratzer zu vermeiden. Spezielle Glasreinigungsmittel helfen dabei, Seifenreste zu entfernen und das Glas glänzend zu halten. Vermeiden Sie aggressive Chemikalien, die die Oberflächen beschädigen könnten.

Häufige Probleme und Lösungen

Einige häufige Probleme bei Duschkabinen sind Undichtigkeiten, Schimmelbildung und Verkalkung. Wenn Sie eine Undichtigkeit feststellen, überprüfen Sie die Dichtungen und Wände. Bei Schimmel ist eine gründliche Reinigung mit einem speziellen Schimmelentferner ratsam. Um Verkalkung zu vermeiden, kann es hilfreich sein, nach jeder Benutzung das Wasser von den Oberflächen abzulassen oder einen Wasserenthärter zu installieren.

Langzeitpflege für Ihre Duschkabine 100×100

Für die Langzeitpflege Ihrer Duschkabine 100×100 sollten Sie regelmäßig die Dichtungen und Riegel auf Abnutzung überprüfen. Die Türen sollten gut schließen und die Mechanismen sollten geschmiert werden, um einen reibungslosen Betrieb zu gewährleisten. Planen Sie jährliche Inspektionen ein, um sicherzustellen, dass Ihre Duschkabine in einwandfreiem Zustand bleibt.

Beliebte Designs und Trends

Aktuelle Trends in der Duschkabine 100×100

Der Trend geht zu minimalistischen und eleganten Designs. Transparente Glastüren und schlichte Linien sind angesagt und verleihen dem Badezimmer ein modernes Aussehen. Bequeme Funktionen wie Rainfall-Duschköpfe und integrierte Ablagen erfreuen sich ebenfalls wachsender Beliebtheit.

Personalisierungsmöglichkeiten

Personalisierung in der Duschkabine 100×100 kann durch die Wahl einzigartiger Fliesen, spezieller Armaturen und Anpassungen bei den Türen erfolgen. Farb- und Materialwahl können ebenfalls personalisiert werden, um sicherzustellen, dass Ihre Duschkabine zum Rest Ihres Badezimmers passt. Überlegen Sie, ob funktionale Zusatzoptionen, wie integrierte Beleuchtung oder Heizkabel, für Sie von Nutzen sein könnten.

Vergleich verschiedener Stile und Designs

Es gibt viele verschiedene Stile von Duschkabinen 100×100, von modern bis traditionell. Während ein modernes Design klare Linien und minimales Zubehör bietet, könnte ein traditionelles Design auf zeitlosen Elementen und warmen Farben basieren. Entscheiden Sie sich für einen Stil, der nicht nur zu Ihrem persönlichen Geschmack passt, sondern auch harmonisch mit dem Rest des Badezimmers gestaltet ist.

Häufig gestellte Fragen

Wie viel Platz benötigt eine Duschkabine 100×100?

Eine Duschkabine 100×100 benötigt mindestens 1 Quadratmeter Platz. Achten Sie darauf, zusätzlichen Raum für den Zugang und die Nutzung zu berücksichtigen.

Was sind die besten Materialien für Duschkabinen?

Die besten Materialien sind Sicherheitsglas für die Wände und hochwertige Metalle für die Rahmen. Diese sind langlebig und pflegeleicht.

Wie oft sollte ich meine Duschkabine reinigen?

Idealerweise sollte die Duschkabine nach jeder Nutzung kurz abgewischt werden. Eine gründliche Reinigung sollte mindestens einmal pro Woche erfolgen.

Welche Dichtungen sind für Duschkabinen geeignet?

Gummidichtungen sind am weitesten verbreitet, da sie flexibel sind und eine gute Abdichtung gewährleisten. Achten Sie auf schimmelresistente Optionen.

Wie kann ich die Lebensdauer meiner Duschkabine verlängern?

Regelmäßige Reinigung und Wartung, sowie die richtige Verwendung von Dichtungen und Beschlägen, können die Lebensdauer Ihrer Duschkabine erheblich verlängern.

Posted on

Die besten Vorteile einer duschkabine 90×90 komplett für Ihr Badezimmer

Verwalten Sie Ihre duschkabine 90x90 komplett mit herausragendem Design und eleganter Atmosphäre.

Einführung in die duschkabine 90×90 komplett

Die Wahl der richtigen Dusche kann einen erheblichen Einfluss auf die Funktionalität und Ästhetik Ihres Badezimmers haben. Insbesondere die duschkabine 90×90 komplett hat sich als eine sehr beliebte Wahl für viele Hausbesitzer etabliert. In diesem Artikel werden wir die verschiedenen Aspekte der duschkabine 90×90 komplett ausführlich betrachten und Ihnen helfen, informierte Entscheidungen zu treffen, die auf Ihre spezifischen Bedürfnisse zugeschnitten sind.

Was ist eine duschkabine 90×90 komplett?

Eine duschkabine 90×90 komplett ist eine geschlossene Duschumgebung mit den Maßen 90 cm x 90 cm. Diese Duschen werden häufig als vollständige Systeme verkauft, die alle notwendigen Komponenten enthalten, wie zum Beispiel Wände, Türen und oft auch eine Duschwanne. Diese Komplettsets sind ideal für Renovierungen oder Neubauten, da sie die Installation erheblich vereinfachen.

Vorteile einer duschkabine 90×90 komplett

Die duschkabine 90×90 komplett bietet viele Vorteile, die sie zu einer hervorragenden Wahl für jedes Badezimmer machen:

  • Platzersparnis: Dank ihrer kompakten Abmessungen eignet sich die duschkabine 90×90 komplett besonders gut für kleinere Badezimmer.
  • Einfache Installation: Viele Modelle sind als Komplettsysteme konzipiert und lassen sich daher leicht selbst installieren.
  • Vielfältige Designs: Erhältlich in verschiedenen Stilrichtungen – von modern bis klassisch – fügt sich die duschkabine 90×90 komplett nahtlos in Ihr Badezimmer ein.
  • Wasser- und Energieeffizienz: Moderne Duschen sind oft darauf ausgelegt, den Wasserverbrauch zu reduzieren, was nicht nur umweltfreundlicher ist, sondern auch Ihre Rechnungen senken kann.

Einsatzmöglichkeiten und Designoptionen

Die Duschen können in vielen verschiedenen Badezimmer-Stilen eingesetzt werden. Ob in einer eleganten, modernen Wohnung oder einem traditionellen familientauglichen Bad, die duschkabine 90×90 komplett ist äußerst vielseitig. Sie können Glas- oder Kunststoffwände, verschiedene Arten von Duschköpfen und Armaturen wählen, um Ihre persönliche Note zu verleihen.

Auswahl der richtigen duschkabine 90×90 komplett

Materialien und Bauarten

Die Materialwahl für eine duschkabine 90×90 komplett spielt eine wesentliche Rolle in Bezug auf Langlebigkeit und Pflege. Die gängigsten Materialien sind:

  • Sicherheitsglas: Bietet eine elegante Ästhetik und ist gleichzeitig widerstandsfähig und leicht zu reinigen.
  • Kunststoff: Oft mottensicher, leicht und preisgünstig, jedoch möglicherweise weniger haltbar als Glas.
  • Edelstahl: Ideal für die Armaturen und Brausen, bietet es ein modernes und zeitgenössisches Gefühl.

Wichtige Maße und Platzierung

Vor der Auswahl Ihrer duschkabine 90×90 komplett sollten Sie sicherstellen, dass der verfügbare Platz im Badezimmer ausreicht. Hier sind einige wichtige Punkte zu beachten:

  • Raumhöhe: Messen Sie die Höhe des Raumes, um sicherzustellen, dass die Dusche gut passt.
  • Zugang: Stellen Sie sicher, dass der Zugang zur Dusche einfach ist und dass sich die Türen problemlos öffnen lassen.
  • Drainage: Vergewissern Sie sich, dass es eine geeignete Ablauffläche gibt, um Wasserstaus zu vermeiden.

Preis-Leistungs-Verhältnis verstehen

Das Preis-Leistungs-Verhältnis einer duschkabine 90×90 komplett hängt von mehreren Faktoren ab, einschließlich der Qualität der Materialien, der Komplexität des Designs und der enthaltenen Funktionen. Berücksichtigen Sie den langfristigen Nutzen, den Sie aus einer hochwertigen Dusche ziehen werden, und investieren Sie, wenn möglich, in einen soliden und nachhaltigen Kauf.

Installation einer duschkabine 90×90 komplett

Schritt-für-Schritt Installationsanleitung

Die Installation einer duschkabine 90×90 komplett kann mit ein wenig Geschick und den richtigen Werkzeugen relativ einfach sein. Hier ist eine allgemeine Anleitung:

  1. Vorbereitung: Entfernen Sie alte Sanitärinstallationen und reinigen Sie den Bereich gründlich.
  2. Untergrund prüfen: Stellen Sie sicher, dass der Boden eben und stabil ist, um optimale Bedingungen für die Duschwanne zu schaffen.
  3. Duschwanne installieren: Platzieren Sie die Duschwanne und richten Sie sie nach Wasserablaufmöglichkeiten aus.
  4. Wände montieren: Befestigen Sie die Duschwände gemäß den Herstelleranweisungen, dabei die Abdichtungen nicht vergessen.
  5. Tür installieren: Montieren Sie die Duschtüren, wobei Sie alle Gelenke und Scharniere richtig platzieren.
  6. Schlusskontrolle: Überprüfen Sie alle Verbindungen, um sicherzustellen, dass alles dicht ist.

Werkzeuge und Materialien, die benötigt werden

Für die Installation benötigen Sie einige essentielle Werkzeuge und Materialien:

  • Schraubendreher
  • Wasserwaage
  • Bohrmaschine
  • Dichtungsmittel
  • Verbindungsteile

Häufige Fehler bei der Installation vermeiden

Es gibt einige häufige Fehler, die bei der Installation vermieden werden sollten. Dazu gehören:

  • Unzureichende Abdichtung, die zu Wasserschäden führen kann.
  • Falsche Maße, die dazu führen, dass die Dusche nicht passt.
  • Nichtbeachtung der Montageanleitung, die zu strukturellen Problemen führen kann.

Pflege und Wartung der duschkabine 90×90 komplett

Reinigungsmethoden und -tipps

Um die Langlebigkeit Ihrer duschkabine 90×90 komplett zu gewährleisten, ist eine regelmäßige Reinigung unerlässlich. Hier sind einige Tipps:

  • Verwenden Sie milde Reinigungsmittel, die keine aggressiven Chemikalien enthalten.
  • Nach jedem Gebrauch die Oberflächen trocken abwischen, um Kalkbildung zu vermeiden.
  • Mindestens einmal pro Woche eine gründliche Reinigung durchführen.

Langfristige Pflege für beste Ergebnisse

Zusätzlich zur regelmäßigen Reinigung sollten Sie auch folgende Punkte beachten:

  • Die Dichtungen regelmäßig überprüfen und ggf. austauschen.
  • Die Armaturen auf Rost oder Ablagerungen untersuchen und reinigen.
  • Für die Oberfläche geeignete Pflegemittel verwenden, um die Optik zu erhalten.

Beliebte Reinigungsprodukte

Einige empfohlene Reinigungsprodukte für Ihre duschkabine 90×90 komplett sind:

  • Fettlöser für Hartnäckige Ablagerungen
  • Essiglösung gegen Kalk
  • Microfasertücher für die Oberflächenpflege

Häufige Fragen zur duschkabine 90×90 komplett

Wie viel Platz benötigt eine duschkabine 90×90 komplett?

Eine duschkabine 90×90 komplett benötigt mindestens 1 qm Fläche, um bequem platziert werden zu können.

Welche Materialien sind am besten für eine duschkabine 90×90 komplett?

Vorgeschlagene Materialien umfassen Glas, Edelstahl und langlebige Kunststoffe, die wasserbeständig sind.

Wie kann ich meine duschkabine 90×90 komplett pflegen?

Regelmäßige Reinigung mit milden Reinigungsmitteln und das Trocknen der Oberflächen verhindern Kalkablagerungen.

Wo kaufe ich eine duschkabine 90×90 komplett?

Ein Duschenfachgeschäft oder große Online-Shops bieten eine Vielzahl an Auswahlmöglichkeiten und Preisklassen.

Wie installiere ich eine duschkabine 90×90 komplett selbst?

Folgen Sie den Installationsanleitungen und stellen Sie sicher, dass Sie die richtigen Werkzeuge zur Hand haben.

Posted on

Choosing the Perfect Shower Base for Your Bathroom Needs

Elegant shower base showcased in a bright bathroom with minimalist design.

Understanding Shower Base Types

Different Materials for Shower Base

The material you choose for your shower base significantly impacts both the aesthetics and functionality of your bathroom. Common materials include acrylic, fiberglass, porcelain, and natural stone.

Acrylic is lightweight and comes in a variety of colors and designs. It is easy to clean and can last for years without fading. Its smooth surface reduces mold and mildew growth, making it a popular choice.

Fiberglass, while also lightweight, is made from resin and has a textured surface that can be beneficial for slip resistance. However, fiberglass can be prone to scratching and may require more frequent replacements over time.

Porcelain offers a classic, timeless look and is extremely durable. It is resistant to scratching and chips, but it can be heavy and expensive compared to acrylic and fiberglass.

Natural stone options such as granite, marble, or slate provide unmatched elegance and a unique touch to your bathroom. However, they can be expensive and often require sealing to prevent stains and damage.

Benefits of a Custom Shower Base

Investing in a custom shower base can elevate your bathroom’s design and functionality. Custom bases can be tailored to precise measurements, ensuring a perfect fit for your space.

One major benefit is versatility; custom shower bases can be made to include unique features like built-in storage or seating, enhancing usability. Additionally, customization allows homeowners to integrate design elements that complement other fixtures in the bathroom, creating a cohesive aesthetic.

Durability is another advantage; a custom base can use high-quality materials specific to your needs, providing longevity and reducing the risk of damage from water or impact. Finally, custom options typically come with a range of texture and color choices that standard models may not offer.

Standard Sizes and Dimensions Explained

Understanding standard sizes for a shower base is crucial for finding the right fit for your bathroom. Common dimensions range from 30×30 inches to 60×34 inches for rectangular models, accommodating most shower enclosures.

While standard sizes can provide ease of installation, it’s essential to measure your shower space accurately to avoid gaps or improper fits. Ensuring the base has adequate drainage slope is also critical to prevent standing water.

Consider the height of the base as well; most are designed to be 3-5 inches high. This height helps with water flow into the drain but can pose accessibility issues for some users, making it crucial to match the base to the user’s needs and preferences.

Installing Your Shower Base

Preparation Steps Before Installation

Proper preparation is fundamental for a successful shower base installation. The first step is to measure your space carefully and ensure all tools and materials are available. Gather essential tools such as a level, measuring tape, adhesive, and waterproofing materials.

Ensure that the subfloor is clean, dry, and free from any debris or previous fixtures. Assess the plumbing to check that the drain is appropriately positioned and functions properly. A qualified plumber may be necessary for any modifications.

It’s also wise to review your local building codes to ensure compliance, as they can dictate drainage systems and installation practices.

Step-by-Step Installation Guide

Follow this step-by-step guide for a seamless installation of your shower base:

  1. Prepare the Subfloor: Ensure it’s leveled and smooth, using leveling compound if necessary.
  2. Dry Fit: Place the shower base in position without adhesive to see how it fits.
  3. Apply Waterproofing: Coat the subfloor with a waterproof membrane or appropriate material.
  4. Set the Base: Apply adhesive to the base and carefully set it in place, ensuring it’s level.
  5. Attach the Drain: Connect the drain according to manufacturer instructions.
  6. Seal Edges: Use silicone to seal all edges and joints to prevent water leaks.
  7. Allow Curing Time: Let everything set according to adhesive and grout instructions.

Common Mistakes to Avoid

Installation errors can lead to costly repairs or even complete replacements of the shower base. Common mistakes include failing to check the level of the base, which can result in poor water drainage and leaks.

Not allowing enough curing time for adhesive or grout can also lead to movement and possible misalignment of the base. Ensure proper sealing around the edges is done meticulously, as improper sealing can lead to mold and mildew buildup beneath the tiles.

Lastly, neglecting to consider the user experience, such as accessibility or space for shower essentials, can lead to frustration and an impractical setup.

Caring for Your Shower Base

Best Cleaning Practices

To keep your shower base looking pristine, adopt proper cleaning practices. Avoid harsh chemicals that can damage the finish. Instead, opt for mild soap and a soft sponge or cloth for regular cleaning.

For tough stains, a vinegar and baking soda paste can work wonders without harming the surface. Regular cleaning not only enhances aesthetic appeal but also prolongs the life of the base by preventing the buildup of soap scum and mildew.

Preventing Damage and Wear

Preventative care is crucial for maintaining your shower base. Using a mat can reduce wear from foot traffic and minimize slip hazards. Additionally, be mindful of sharp objects that could potentially scratch the surface.

Address any grout or sealing issues promptly to avoid water infiltration and resultant damage to the underlying structure. Regularly inspect plumbing connections and the integrity of the base itself to catch potential problems early.

Long-term Maintenance Tips

In the long run, consider applying a sealant to protect your shower base from stains and water damage. For materials like natural stone, resealing annually can significantly prolong the surface’s appearance and performance.

Consider scheduling a professional maintenance check every few years, especially if you notice any issues. Keeping your shower base in optimal condition not only enhances the longevity of your investment but also improves the overall bathroom experience.

Enhancing Your Shower Base Aesthetics

Choosing the Right Tiles

The tiles you choose to surround your shower base can drastically change the room’s look. Tiles come in various materials, colors, and patterns, allowing for personalized designs that match your style.

Consider going with larger tiles to minimize grout lines for a sleek, modern look, or opt for smaller tiles for intricate mosaics. The texture and finish of the tiles also play a role; matte finishes may be preferred for slip resistance, while glossy tiles reflect light and create an illusion of space.

Accessorizing Around Your Shower Base

Accessorizing can enhance your shower base area aesthetically and functionally. Adding shelves or seating can also provide convenience without sacrificing style. Match towel racks and hooks to your overall design scheme for a cohesive look.

Consider plants or decorative baskets for added warmth and personality. Just ensure any decor used in the shower area is water-resistant and easy to clean to maintain hygiene and safety.

Lighting Options to Highlight Your Shower Base

Effective lighting can enhance the beauty of your shower base and the entire bathroom. Consider recessed lighting or sconces that light up the shower area without being too harsh.

Installing a dimmer switch allows adaptability, providing bright light for cleaning and a softer ambiance for relaxation. Additionally, backlit mirrors can create a spa-like atmosphere, highlighting your shower setup beautifully.

Frequently Asked Questions

What is the best material for a shower base?

The best material depends on your preference for maintenance, durability, and aesthetic. Acrylic and porcelain are popular for their ease of cleaning, while natural stone provides unique beauty.

How do I repair a damaged shower base?

Repairs can vary by material. For minor scratches, use a specific polish for that surface. For cracks, professional repairs or replacement may be necessary, especially for fiberglass or acrylic.

Can I install a shower base myself?

Yes, DIY installation of a shower base is possible if you have the proper tools and knowledge. However, hiring a professional can ensure a flawless finish and compliance with plumbing codes.

What size shower base should I choose?

The size should match your available space and user needs. Standard sizes range from 30×30 to 60×34 inches but always measure your area before purchasing.

How do I clean my shower base effectively?

Use a mild cleaner and a soft cloth or sponge to clean your shower base. For tougher stains, a baking soda and vinegar paste can help without damaging the surface.

Posted on

Illuminate Your Space with a Stunning Mirror Light Mirror

Illuminate your bathroom with a stunning mirror light mirror, reflecting elegance and style.

Understanding the Benefits of Mirror Light Mirror

Enhancing Bathroom Aesthetics

The mirror light mirror serves not only as a functional element in your bathroom but as a crucial aesthetic accessory as well. These mirrors often boast sleek designs and integrated lighting that contribute to a more modern and polished look. By providing a luminous backdrop, they can significantly transform the ambiance of the space, making it feel more welcoming and refined. Consider them an artistic statement that complements your overall design theme.

Improving Ambient Light Quality

The quality of light in your bathroom is paramount, especially in a space where grooming and self-care activities occur. A standard overhead light might cast harsh shadows, making it difficult to see details clearly. In contrast, a mirror light mirror offers balanced illumination that minimizes shadows and enhances visibility. The right kind of lighting not only improves functionality but also contributes to a calm atmosphere, promoting a more relaxing bathing experience.

Maximizing Space and Functionality

Space management is essential in many bathrooms, especially in smaller homes where every inch counts. A mirror light mirror combines two essential functions—lighting and reflection—into a single unit, helping to maximize the effective use of space. By using a mirror that also serves to illuminate, you can reduce clutter and create a roomier feel without sacrificing utility.

Choosing the Right Mirror Light Mirror

Styles to Consider

The market offers a plethora of styles when it comes to mirror light mirrors. From minimalist designs to ornate styles, you have options that can cater to your taste and the existing decor of your bathroom. Frameless mirrors offer a sleek, contemporary appearance, whereas framed variants can harmony with traditional or rustic settings. Adjustable features, such as dimming capability or color temperature adjustment, are also becoming increasingly popular, allowing you to customize lighting based on your needs.

Factors to Assess: Size, Shape, and Finish

Selecting the appropriate size and shape is crucial; a large mirror may overwhelm a small space, while a tiny mirror might get lost in a vast bathroom. Generally, round mirrors soften angular spaces, making them feel more inviting, while rectangular mirrors create a more formal look. Additionally, think about the finish. High-gloss finishes tend to reflect light more effectively, enhancing brightness, while matte finishes add warmth.

Wattage and Light Color Options

When choosing your mirror light mirror, consider wattage and color temperature. Typically, LED lights are energy-efficient and available in various lumens, which measures brightness. Aim for lighting that mimics natural daylight (around 5000K) for the most accurate colors, especially when applying makeup. If you prefer a warmer atmosphere, you can choose bulbs that emit a soft white light (around 2700K). It’s essential to find the right light balance for both functionality and ambiance.

Installation Tips for Your Mirror Light Mirror

Proper Placement and Height

Correct placement of your mirror light mirror can dramatically affect its effectiveness. Keep the mirror at eye level, which typically translates to 54 to 60 inches from the floor. Additionally, positioning it above the sink ensures optimal lighting when performing daily tasks like shaving or applying skincare products. For dual sinks, opt for separate mirrors for each side to further enhance functionality.

Wiring and Power Source Considerations

If your mirror requires hardwiring, consulting a professional electrician is advised for a seamless installation. Ensure that the wiring conforms to local electrical codes to prevent any hazards. For plug-in alternatives, choosing an outlet accessible within the vicinity is essential. Power strips can be used for multiple light functions, but ensure they are mounted safely away from water sources.

Safety Precautions During Installation

Safety should always come first when installing your mirror light mirror. Ensure to turn off the electrical supply before working with wires, and if you’re handling heavy mirrors, seek assistance to avoid accidents. Utilizing appropriate anchor screws and brackets can also ensure that the mirror is safely secured to the wall, preventing any risk of falling.

Maintaining Your Mirror Light Mirror

Cleaning Techniques for Optimal Clarity

To keep your mirror light mirror sparkling, adopt a regular cleaning routine. Use a mixture of equal parts vinegar and water or a gentle glass cleaner. Apply the solution with a microfiber cloth to avoid scratches, wiping in a circular motion for best results. Avoid harsh chemicals, as they can damage the mirror’s reflective surface over time.

Preventing Damage in Humid Environments

Bathrooms are notoriously humid, which can lead to issues like cloudiness or mildew on mirrors. To combat this, ensure proper ventilation, utilizing an exhaust fan during and after showers. Additionally, regularly inspect the edges of your mirror light mirror for any signs of moisture damage, and seal the edges if necessary to maintain longevity.

Packing and Handling During Moves

When relocating, it’s vital to protect your mirror light mirror during transit. Wrap it in bubble wrap and secure it within its original packaging if available. Mark the box clearly as “fragile,” and ensure it is placed upright during transportation. Upon arriving, take extra care when unwrapping the mirror to avoid breaking or scratching its surface.

Innovative Trends in Mirror Light Mirror Design

Smart Technology Integration

Today’s mirror light mirrors can integrate smart technology, providing the convenience of touch controls or voice commands. Features include adjustable brightness, color-changing LEDs, and even built-in Bluetooth speakers for music. These innovations elevate the user experience, allowing for a bathroom that feels more modern and personalized.

Eco-friendly and Energy-efficient Options

In recent years, the trend towards sustainability has resulted in a rise of eco-friendly mirrors. Many modern mirror light mirrors utilize LED lighting, which significantly reduces energy consumption compared to traditional bulbs. Additionally, many manufacturers are opting for sustainable materials and finishes, contributing to a more environmentally responsible product.

Unique Customization Ideas

Customization is another emerging trend within the mirror light mirror market. Homeowners can choose mirrors with personalized features such as adjustable frames, additional storage, or integrated media systems. Some creative designs even include etched patterns or LED displays that showcase time or temperature, adding a unique touch to standard bathroom setups.

FAQs About Mirror Light Mirrors

What are the benefits of a mirror light mirror?

A mirror light mirror enhances aesthetics, improves ambient lighting, and maximizes space while providing practicality, making it perfect for any bathroom.

How do I choose the right size mirror light mirror for my bathroom?

Consider the proportionality of the mirror to your sink and wall space. A good guide is to have the mirror be 60-70% of the vanity width.

Can I install a mirror light mirror myself?

Yes, but if it involves electrical wiring, it’s safer to consult a licensed electrician to ensure compliance with local codes and safety standards.

How do I maintain my mirror light mirror?

Regularly clean with a gentle solution, avoid harsh chemicals, and maintain a dry environment to prevent moisture damage.

Are mirror light mirrors energy-efficient?

Most modern mirror light mirrors use LED technology, which is highly energy-efficient compared to traditional lighting solutions.

Posted on

Stylish Solutions for Your Shower Screen Door Needs

Showcase modern shower screen door with sleek design and elegant bathroom setting.

The Importance of Choosing the Right Shower Screen Door

When it comes to creating a luxurious and practical bathroom, one of the most vital decisions you’ll face is selecting the best shower screen door for your space. A shower screen door not only enhances the aesthetics of your bathroom but also serves critical functional roles—ranging from preventing water spills to providing a serene showering experience. With the plethora of designs, materials, and functionalities available in the market, understanding what to look for is essential.

Understanding Types of Shower Screen Door

Shower screen doors are available in various styles, each with unique features that cater to different needs and preferences.

  • Frameless Shower Screen Doors: These doors offer a sleek look and seamless glass installation that creates an illusion of space. They are easy to clean and maintain.
  • Framed Shower Screen Doors: Typically more affordable, these doors come with a metal frame that provides additional stability and supports added designs.
  • Bi-Fold Shower Screen Doors: Ideal for small spaces, these doors fold inwards, maximizing shower space while offering easy access.
  • Sliding Shower Screen Doors: Perfect for larger bathrooms, sliding doors operate on a track and allow for an elegant, space-saving solution.
  • Hinged Shower Screen Doors: These doors swing open like a traditional door and can create a wider entrance to the shower area.

Factors to Consider Before Purchase

Choosing the right shower screen door requires careful consideration of several factors that align with your preferences and bathroom layout.

  • Space: Measure the area where the door will be installed to ensure it fits without obstruction.
  • Style: Opt for designs that complement the overall theme of your bathroom, whether modern, traditional, or minimalist.
  • Material: Choose between glass types, like tempered or laminated, to attain durability and safety.
  • Water Resistance: Look for doors with proper seals and fittings to minimize water leakage.
  • Maintenance: Consider how easy the door will be to clean; some materials may require more upkeep than others.

Benefits of Installing a Quality Shower Screen Door

Investing in a quality shower screen door comes with numerous benefits that extend beyond aesthetic appeal. Here are some core advantages:

  • Enhanced Aesthetics: A stylish shower screen door can elevate your bathroom décor and create a sense of luxury.
  • Water Management: Properly designed doors prevent water from spilling out onto the bathroom floor, minimizing slips and water damage.
  • Increased Property Value: A well-installed shower screen door is an attractive feature for potential buyers, increasing your property’s resale value.
  • Personal Comfort: A decorative shower door can make your bathing experience more enjoyable by providing privacy and a more open feel.
  • Customization: Many options allow for customization, ensuring you get a door that meets your unique needs.

Installing Your Shower Screen Door: A Step-by-Step Guide

Preparation and Tools Required

Before diving into installation, ensure you gather all necessary tools and materials. You will need:

  • Drill
  • Measurement tape
  • Level
  • Screwdriver
  • Sealant
  • Stud finder
  • Safety goggles

Once you have all your tools ready, the next step is ensuring you have the exact measurements of your shower area, which will dictate the size of the shower screen door you will need.

Installation Process Explained

The installation process is critical for ensuring your shower screen door operates effectively. Here’s a simplified step-by-step guide:

  1. Measure and Mark: Use a level and tape measure to determine where the door will attach.
  2. Drill Holes: Carefully drill holes into the wall and tile according to the manufacturer’s specifications.
  3. Install Hinges or Track: Depending on your door type, follow the instructions to install hinges or a track securely.
  4. Hang the Door: With help, position the door properly and secure it in place.
  5. Seal the Edges: Apply sealant to prevent leaks and ensure a clean finish.

Common Mistakes to Avoid

While installing a shower screen door may seem straightforward, there are several common pitfalls to avoid:

  • Improper measurements can lead to a poorly fitted door.
  • Neglecting to level the door during installation can affect functionality.
  • Using the wrong type of sealant may not provide the desired water resistance.
  • Failing to read the manufacturer’s installation guide introduces complications later on.

Maintenance Tips for Shower Screen Door Longevity

Regular Cleaning Techniques

Keeping your shower screen door clean not only maintains its appearance but also ensures longevity. Implement these cleaning tips:

  • Use a squeegee after each shower to prevent soap scum build-up.
  • Opt for a mixture of water and vinegar to remove hard water stains.
  • Employ a non-abrasive cleaner to preserve the glass integrity.

Preventing Water Damage and Mold

Water intrusion is a common cause of bathroom mold, so prevention is key. Consider these practices:

  • Ensure proper sealing at the edges of the shower screen door.
  • Keep the bathroom well-ventilated to reduce humidity levels.
  • Inspect regularly for leaks and address any issues immediately.

Assessing and Repairing Hardware Issues

Regularly checking the hardware of your shower screen door is crucial for smooth operation. Here’s what to monitor:

  • Ensure hinges and tracks are free from debris and obstructions.
  • Check for signs of rust or corrosion, replacing worn hardware as necessary.
  • Lubricate moving parts periodically to ensure ease of operation.

Innovative Trends in Shower Screen Door Design

Popular Materials and Their Benefits

Choosing the right material for your shower screen door can significantly impact durability and appearance. Here are some popular materials:

  • Tempered Glass: Highly durable and shatter-resistant, ideal for safety.
  • Frameless Glass: Offers a minimalist look while ensuring modern elegance.
  • Acrylic: Lightweight and versatile with extensive design options.

Customizing Your Shower Screen Door

Customization options allow homeowners to tailor their shower screen doors to fit specific design aesthetics. Consider:

  • Frosted glass for added privacy without sacrificing light.
  • Etched designs to incorporate personal style.
  • Various finishes on frames to match existing bathroom hardware.

Eco-Friendly Shower Screen Door Options

As sustainability becomes a growing concern in home design, eco-friendly options are emerging. Look for:

  • Doors made from recycled materials, which reduce environmental impact.
  • Water-saving features that minimize excess water usage during showers.
  • Low-VOC sealants and finishes to promote better indoor air quality.

Frequently Asked Questions About Shower Screen Doors

What is the best material for a shower screen door?

Tempered glass is often regarded as the best due to its durability, shatter resistance, and aesthetic appeal.

How do I ensure my shower screen door is water-resistant?

Choose designs with effective seals and ensure proper installation and sealing around the edges to prevent leaks.

Can I install a shower screen door myself?

Yes, with proper tools and patience, you can install it yourself. Just follow the manufacturer’s instructions carefully.

How often should I clean my shower screen door?

For best results, clean it at least once a week or after each use to prevent build-up of soap scum and hard water stains.

Are framed or frameless shower screen doors better?

This depends on personal preference. Frameless doors offer a sleek look, while framed doors provide structure and support.

Posted on

Enhance Your Bathroom with a Stunning Shower Screen Door

Showcase of a modern shower screen door in a luxurious bathroom setting with elegant design.

Understanding Shower Screen Door Types

The right shower screen door can greatly enhance the aesthetics and functionality of your bathroom. With numerous designs available, selecting the ideal option requires a clear understanding of the various types on the market. From simple framed versions to elegant frameless designs, each type offers unique benefits and drawbacks suited for different tastes and needs.

Frameless Shower Screen Door Benefits

Frameless shower screen doors are increasingly popular for their sleek, modern look. These doors are made from thick, tempered glass and are fixed in place using discreet wall mounts or hinges. The absence of framing not only creates an unobstructed view but also makes the bathroom appear more spacious and airy.

Some key benefits include:

  • Aesthetic Appeal: They provide a contemporary look that complements minimalist and modern bathroom designs.
  • Easier Cleaning: Without frames, there are fewer crevices to collect grime and mold, simplifying maintenance.
  • Customization: Frameless screens can be tailored to various sizes and shapes, accommodating unique shower configurations.

Framed vs. Frameless: A Comprehensive Comparison

The choice between framed and frameless shower screen doors can significantly impact the overall look and functionality of your bathroom. Here’s a detailed comparison:

Feature Framed Shower Screen Door Frameless Shower Screen Door
Visual Appearance Traditional, more visible hardware Modern, seamless appearance
Installation Usually simpler due to pre-fabricated frames Requires precise mounting and level
Cost Generally lower Higher initial investment
Durability Includes protective coating on the frame Glass is highly durable but may require careful handling

Ultimately, the choice will depend on your style preferences, budget, and installation capabilities.

Choosing the Right Glass Thickness

When selecting a glass thickness for your shower screen door, it’s essential to consider both safety and aesthetics. Standard thickness options range between 3/8 inch (10mm) to 1/2 inch (12mm), with each offering different advantages:

  • 3/8 inch (10mm): Ideal for smaller spaces or lower budgets. Offers adequate support for frameless designs.
  • 1/2 inch (12mm): Recommended for larger openings and heavier use. Provides enhanced stability and durability.

It’s critical to consult with a professional to determine the most suitable thickness based on your specific installation and usage requirements.

Installation Process of Shower Screen Door

Installing a shower screen door can be a rewarding DIY project, but proper preparation is key to achieving a professional result. Whether you opt for the framed or frameless variety, understanding the installation steps will help ensure a smooth process.

Preparing Your Bathroom for Installation

Before beginning the installation, ensure the bathroom area is prepared and organized. Follow these steps:

  • Measure the Space: Accurate measurements are crucial. Measure the height and width of the shower opening.
  • Choose Your Door: Decide on the style, such as sliding or hinged, based on your bathroom layout.
  • Gather Tools and Materials: Common tools include a level, drill, silicone sealant, and screwdrivers.

Taking time to prepare can save you potential mistakes down the line.

Step-by-Step Guide to Installing Shower Screen Door

Follow this step-by-step guide to effectively install your shower screen door:

  1. Mark the Position: Use a level to draw lines indicating where the door will be mounted.
  2. Install Wall Brackets: Secure brackets using appropriate anchors for glass doors if required.
  3. Attach Door Hinges: For hinged models, attach hinges to the door according to manufacturer guidelines.
  4. Mount the Door: With assistance, lift the door onto the brackets and secure it into place.
  5. Seal Joints: Apply silicone sealant around edges to prevent water leakage.
  6. Final Adjustments: Adjust levels and make fine-tuning as necessary.

Once installation is complete, allow adhesive sealants to cure based on the manufacturer’s instructions.

Common Mistakes to Avoid During Installation

To ensure a successful installation, watch out for these common pitfalls:

  • Improper Measurements: Confirm all dimensions before purchase; incorrect measurements can lead to mismatches.
  • Neglecting Safety: Always wear protective gear when handling glass, and ensure proper support during installation.
  • Skipping Sealant: Skipping or incorrectly applying sealant may result in water damage and mold growth.

Avoiding these mistakes can lead to a more secure and appealing installation.

Maintenance Tips for Shower Screen Door Longevity

To ensure the longevity of your shower screen door, regular maintenance is essential. Keeping it clean and protected from wear can enhance its lifespan and maintain its appearance.

Cleaning Techniques for Different Glass Types

Glass shower screens can vary in composition, so choose a cleaning method that suits your type:

  • Standard Glass: Use a gentle glass cleaner with a microfiber cloth to avoid scratches.
  • Tempered Glass: Similar care; however, avoid abrasive cleaners to prevent damage.

Establish a regular cleaning schedule to prevent the buildup of soap scum or mineral deposits.

Preventing Water Stains and Hard Water Build-Up

Water stains can detract from the beauty of your shower screen door. To minimize this, consider these strategies:

  • Apply Water-Repellent Coating: Consider using a commercial water-repellent spray to reduce buildup.
  • Wipe Down After Use: A quick wipe-down with a squeegee or microfiber cloth after each shower can help.

These steps significantly reduce the frequency and intensity of cleaning required.

Essential Products for Care of Shower Screen Door

Choosing the right cleaning products is vital for the maintenance of your shower screen door. Essential items include:

  • Glass Cleaner: Opt for a non-abrasive formula that effectively removes soap scum and hard water stains.
  • Microfiber Cloths: These are excellent for wiping down glass without scratching.
  • Water-Repellent Treatments: Regular application can help keep water spots at bay.

Using the right products ensures that your door remains pristine and functional.

Design Trends for Shower Screen Doors

As bathroom aesthetics continue to evolve, shower screen doors play a pivotal role in setting the design tone. Incorporating the latest trends can create a luxurious and inviting space.

Integrating Color and Patterns in Your Bathroom

Diversifying the color palette can elevate the overall look of your bathroom. Here are a few ideas:

  • Colored Frames: Opt for bold colors or metallic finishes to contrast against lighter tiles.
  • Patterned Glass: Consider frosted or etched patterns that maintain privacy while adding visual interest.

Integrating these elements can transform a conventional space into something extraordinary.

Innovative Features to Look for in Shower Screen Door

Modern shower screen doors come with various innovative features designed for comfort and functionality:

  • Soft-Close Mechanism: Ensure doors close gently, reducing the likelihood of slamming.
  • Magnetic Seals: Look for clever sealing systems that prevent leaks and enhance the user experience.

Choosing advanced features enhances usability and adds luxury to your bathroom experience.

Mixing and Matching Shower Screen Doors with Bathroom Styles

Design flexibility is key, and you can seamlessly blend various styles by considering:

  • Contemporary vs. Classic: Frameless designs typically suit modern aesthetics, while framed versions can enhance traditional decor.
  • Coordinating Finishes: Match your shower door’s finish (chrome, black, etc.) to other bathroom fixtures for cohesion.

This attention to detail contributes to a coherent and stylish bathroom environment.

Frequently Asked Questions about Shower Screen Doors

What is a shower screen door?

A shower screen door is a transparent barrier, typically made of glass, designed to enclose a shower space. It prevents water from escaping while maintaining visibility.

How do I maintain my shower screen door?

Regular cleaning with a mild glass cleaner and a soft cloth helps remove soap scum and hard water stains. Wiping it down after each use can prevent buildup.

Can a shower screen door reduce water splashes?

Yes, a well-fitted shower screen door effectively contains water, minimizing splashes outside the shower area, keeping your bathroom drier.

Are frameless shower screen doors safe?

Frameless shower screen doors are constructed from tempered safety glass, which is robust and designed to withstand impact, making them a safe option for bathrooms.

What styles are available for shower screen doors?

Shower screen doors come in various styles, including framed, frameless, sliding, hinged, and bi-fold options to suit different bathroom layouts and design preferences.

Posted on

Finding the Best Back Loofah for Dry Skin: Your Guide to Silkier Skin

Use the best back loofah for dry skin to gently exfoliate and soften your skin.

Understanding the Importance of Exfoliation for Dry Skin

Exfoliation plays a crucial role in maintaining healthy skin, especially for those struggling with dryness. By removing dead skin cells, exfoliation reveals smoother, more radiant skin beneath and allows for better absorption of moisturizers. Among various exfoliating tools, a back loofah is particularly effective for hard-to-reach areas and provides a gentle yet thorough scrub. Finding the best back loofah for dry skin can significantly enhance your skincare routine.

What is Dry Skin?

Dry skin, or xerosis, is characterized by a lack of moisture in the skin’s outer layer, leading to roughness, scaling, and even cracking. Common causes include environmental factors, such as cold weather, low humidity, and excessive washing. Aging also plays a role in skin moisture retention, as sebum production decreases over time. For those affected, understanding the condition is vital for effective management.

Benefits of Exfoliating with a Loofah

Using a loofah for exfoliation offers several advantages. Firstly, it enhances blood circulation, promoting nutrient delivery to skin cells. Secondly, it helps prevent clogged pores, reducing the risk of acne and bumps. Additionally, regular use can improve the efficacy of skincare products by allowing them to penetrate deeper into the skin. This combination of benefits makes the loofah an excellent choice for individuals with dry skin seeking a solution.

Signs You Need a Back Loofah

Knowing when to incorporate a back loofah into your skincare regimen is essential. Key signs your skin may benefit from this tool include:

  • Flaky, rough patches on the back or other hard-to-reach areas.
  • Patchy skin that appears dull and lackluster.
  • Frequent dryness or a feeling of tightness after showering.
  • Increased sensitivity or reaction to body lotions and creams.

Choosing the Right Back Loofah for Dry Skin

Selecting the appropriate back loofah is crucial for maximizing its benefits while minimizing potential irritation. With many options available, understanding the essential features can guide your choice.

Material Options and Their Benefits

Back loofahs come in various materials, each offering unique advantages. Natural loofah sponges are made from the fibrous interior of the loofah plant and are biodegradable, providing a gentle scrubbing action. Synthetic options, such as nylon, often offer a more durable solution. Each material varies in texture and abrasiveness, making personal preference and skin sensitivity important factors to consider.

Loofah Shapes and Sizes Explained

The shape and size of a loofah can affect its usability. Long handles facilitate easier access to the back and other hard-to-reach areas, while larger loofahs provide a broader surface for exfoliating. Opting for a versatile design allows for the best coverage and effectiveness.

What to Look for in Quality Back Loofahs

When deciding on a quality back loofah, consider the following aspects:

  • Durability: Ensure it can withstand regular use without losing its shape.
  • Texture: Choose a texture that will effectively exfoliate without being overly harsh.
  • Ease of cleaning: Check if it can be easily rinsed and dried after each use.
  • Handle design: A sturdy, ergonomic handle can make using the loofah more comfortable.

How to Use a Back Loofah Effectively

Using a back loofah correctly can maximize its benefits and enhance your skincare routine. Follow these guidelines to ensure effective exfoliation.

Step-by-Step Guide to Proper Usage

  1. Start with warm, moist skin to help soften dead skin cells.
  2. Apply a gentle body wash or exfoliant to the loofah.
  3. Begin scrubbing from the lower back and work your way up, using long strokes.
  4. Use light pressure to avoid irritating your skin; let the loofah do the work.
  5. Rinse your back thoroughly with clean water to remove any residual product.

Best Practices to Avoid Skin Irritation

To prevent irritation while using a back loofah, consider the following practices:

  • Limit usage to 2-3 times per week to avoid over-exfoliating.
  • Make sure the loofah is clean before each use to avoid bacterial buildup.
  • Choose a loofah with a texture that agrees with your skin sensitivity level.
  • Always follow exfoliation with a good moisturizer to soothe the skin.

Frequency of Use for Optimal Results

The frequency of using a back loofah varies based on individual skin types. For most, exfoliating 2-3 times a week is sufficient, ensuring that the skin does not suffer from over-exfoliation. However, those with extremely dry or sensitive skin may benefit from less frequent use.

Aftercare: Keeping Your Skin Hydrated

After exfoliation, it’s vital to focus on skin hydration to maintain a healthy barrier and prevent dryness.

Moisturizing Techniques After Exfoliation

To effectively moisturize post-exfoliation, consider applying products while your skin is still damp. This locks in moisture and helps repair the skin barrier. Using emollients or creams rich in fatty acids is particularly beneficial.

Recommended Skin Care Products

For optimal hydration after using a loofah, look for products that contain ingredients like hyaluronic acid, glycerin, or shea butter. These ingredients provide intense nourishment and moisture retention, making them ideal for dry skin.

Hydration Tips for Dry Skin Maintenance

Additionally, ensure you drink plenty of water throughout the day, as hydration from within is equally important. Applying a humidifier in your home can also help maintain skin moisture, especially during dry seasons.

Common FAQs About Back Loofahs for Dry Skin

How often should I use a back loofah?

For most skin types, using a back loofah 2-3 times a week is recommended. This frequency prevents over-exfoliation while still promoting healthy skin renewal.

Can a loofah damage sensitive skin?

A loofah can cause irritation if used too aggressively or too frequently. It’s crucial to select a gentle loofah and be mindful of pressure when scrubbing.

What are the best materials for loofahs?

Natural loofah sponges are often gentler on the skin but synthetic options like nylon can last longer. Choose based on your skin sensitivity and preference.

How do I clean and maintain my loofah?

After each use, rinse your loofah thoroughly and hang to dry. Replace it every few weeks to prevent bacterial buildup and ensure effectiveness.

Are there alternatives to back loofahs?

Yes, alternatives include washcloths, exfoliating gloves, or body brushes, which can also effectively slough off dead skin. Choose the option that feels best for your skin type and needs.